Oh, from your words I am in paint!
We value makeup with a bright accent on the cheeks for the fact that with a blush, the skin looks fresher and more spectacular, and the face is younger and more energetic than without it. Yes, yes, just a few pink-peach strokes on the “apples” of the cheeks – and you are 17. The main thing is not to overdo it and not end up with symmetrical red circles on your face. We asked a star makeup artist and blogger about how to create a harmonious natural blush effect and give your face a gentle glow.
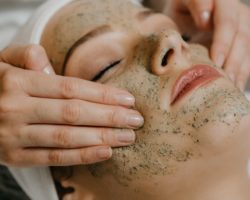
1. SKIN MOISTURIZING
In order to create a light effect of a natural blush, try to moisturize your skin in advance, prepare your face for makeup:
Thoroughly cleanse the skin, ideally do not be lazy and make another nourishing mask (if you have the time), and then apply a moisturizer to the skin, but 15 – 20 minutes before you start to do your makeup. Massage your skin to increase blood flow and help the cream absorb better.
patting on the primer, then foundation, concealer and finally blush.
“When working with clients, I like to use liquid blush: they easily adapt to the skin tone, shade, and they give a perfect makeup without blemishes,” comments the makeup artist.
2. CORRECT SHADE
If you have fair skin tone, I suggest looking at soft, warm blush shades like peach. If your skin tone is dark, then choose products of deeper, saturated shades: berry, powdery – all yours. To create the natural effect of ruddy cheeks, first apply a darker shade of blush on the inside of the cheeks, on the “apples”, and then on the outside, going over it with a lighter shade.
3. WE BEAUTY WITH FINGERS
According to the expert, applying cream blush is most convenient with your fingers: this is an important beauty technique that should be mastered for creating a make-up with a natural blush effect.
With your fingers, you additionally massage the skin, improve blood circulation, and create a natural effect of ruddy cheeks. In addition, you can use a small fluffy brush (preferably made of goat hair) and lightly spread the powder blush over your face to enhance the effect and add brightness to the image.
IMPORTANT
Apply the blush below the tip of the nose: start the movement at a point that is parallel to the pupil. Draw a line across the face and blend the product with a natural bristle brush for dry textures and synthetic bristle brush for liquid textures.
If you want to visually “lift”, narrow, apply blush not on the cheeks, but a little higher, on the cheekbones.
4. ADD SHINES
To make the blush look brighter, do not forget to highlight them with a creamy highlighter: apply the product on the protruding parts of the cheekbones, and then with a thin line on the bridge of the nose.